To resume blogging after a hiatus is harder that I thought. With many ongoing projects and remembering to get enough down time, writing for the blog became less of a priority. I have postponed writing too many times that I have to schedule in daily mandatory ‘writing’ time. Since my last post, I’m getting much better than expected, with occasional fatigue in between days. By following the new routine I’ve shared in my previous post and a careful intake of food, I’m feeling more energised and alert by the day. One of the things I’m doing to help with my digestion is increasing the intake of fermented or cultured food, that has beneficial bacteria.
Did you say Bacteria? Yes, bacteria are our friends.
When we eat fermented foods, we eat the beneficial bacteria – the probiotics – that the food contains. Some functions of probiotics are helping regular bowel movements, improving digestion, enhancing immune function, producing antioxidants and normalizing skin conditions. Eating fermented foods that contain natural, good bacteria helps boost the number and variety of bacteria living in our gut. It is almost like taking probiotic supplements, except it is delicious and far less expensive. Taking a large variety of fermented foods helps to populate your digestive system with a variety of microorganisms. Some examples of fermented foods that are widely available are plain yogurt, miso, tempeh, pickles, sauerkraut, kefir, kimchi, and kombucha. If you get them from the store, check the labels to make sure they do not contain any artificial stuff like preservatives.

The salting process draws out the water from the veggies
Kimchi has been on my To-Do recipe list for the longest time. The process somehow seems quite intimidating, it must have been watching too many Korean drama series with the scenes of Korean women making kimchi by the hundreds of cabbage, with spicy red paste covering their gloved hands. I felt more comfortable to ‘attack’ the recipe after watching Maangchi’s Kimchi recipe video countless of times.
When most people hear the word kimchi, they think of fermented spicy, red-orange shards of napa cabbage that is almost always served in Korean restaurants. In fact, there are over 100 known varieties in Korea, but the most common ones include kkakduki (spicy radish), oi sobagi (cucumber), bossam (rolled kimchi) and chonggak (young radish).

There are various studies in Korea showing that kimchi has tons of health benefits, from anti-aging to losing weight. I once asked a Korean doctor based in KL as to how true is that. He just shrug his shoulders and replied “Koreans just love their kimchi”. One benefit that is for sure, is that fermented food like kimchi aids our digestion. The process of kimchi fermentation creates the healthy bacteria, Lactobacillus (the source of probiotics), which is required by the body to keep a healthy state of intestinal flora.

It takes about 36 hours in my room temperature of 28C in Kuala Lumpur to ferment. It will continue to ferment at a much slower pace after storing in the fridge.
As I’m avoiding ‘cooling food’ (napa cabbage and radish are cooling food according to Traditional Chinese Medicine) during my recovery period, I decided to try bok choy kimchi in my 1st kimchi making attempt. You can use any bok choy variety that you prefer, I use the big variety with white stems in this recipe. However, I was advised that delicate leafy greens like bok choy and cucumber kimchi does not store long, the most is up to a month of storing in the fridge before it turns bad. There’re many uses for kimchi in recipes that this box did not me more than 2 weeks; I use it to make soups, kimchi fried rice, kimchi stews and as base for noodle soup. And Norbert loves it as much as I do, that I made a new batch before the 1st one finishes.

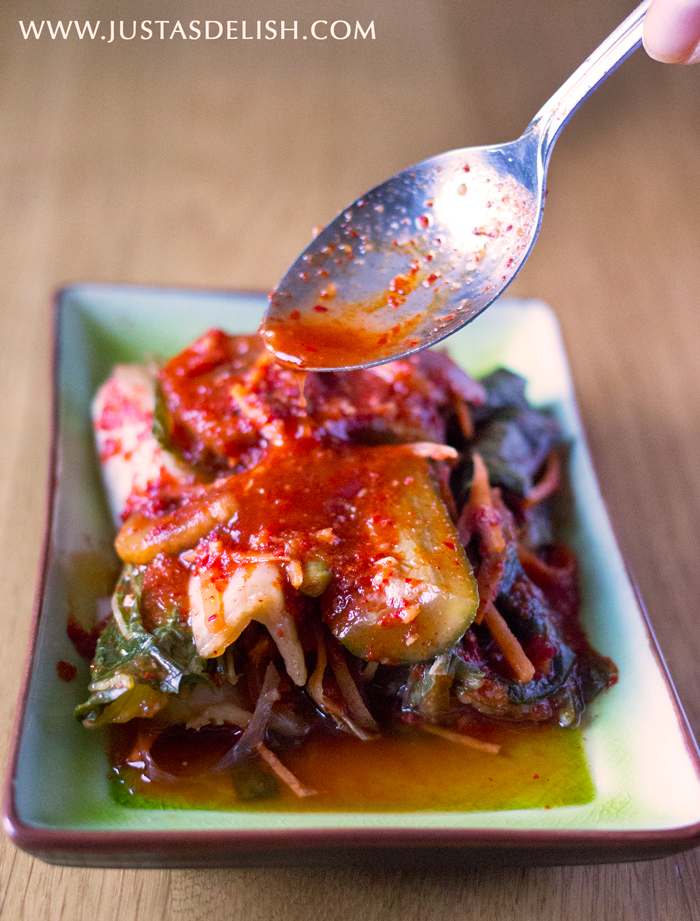
After 36 hours of fermentation, the kimchi should smell and taste sour. Use a wooden spoon to press down the veggies to check for bubbles. If there are bubbles, then the fermentation is complete.
I do not claim to be a kimchi expert, the recipe below has some of my simplified steps that I have adapted from Chowdivine’s recipe. This recipe uses fruits like apple or pear in the seasoning, instead of the ‘glutinous rice porridge’ paste that is normally used in traditional napa cabbage kimchi. If you prefer authentic kimchi recipes, go to sites (like Maangchi or Chow Divine) written by a real Korean for the recipe. Even though my version is simplified, I do know now that this stuff is easy to make and darn tasty. If you do not do well with spicy food, try the the mildly flavoured non spicy white kimchi (baek kimchi).

- 500g Bok Choy – separate the leaves and wash
- 1 large Japanese Cucumber (or 2 small)
- 2 tablespoon Seasalt
- 1 medium Carrot – cut into 5cm thin strips
- 3 Green Onions – cut into 5cm pieces
- 1 Red Apple (or Pear) – peeled
- ¼ Red Onion
- Seasoning
- 1 clove Garlic
- 1cm Ginger
- 2 tablespoon Gochugaru (Korean Red Pepper Flakes)
- ½ Red Capsicum
- ½ Red Apple – peeled
- ¼ Red Onion
- 1 tablespoon fish sauce [br][img src=”http://www.justasdelish.com/wp-content/uploads/2015/05/BokChoyKimchi1-1.jpg” width=”300″ height=”200″ class=”aligncenter size-full” title=”Bok Choy Kimchi with Cucumbers” alt=”Bok Choy Kimchi with Cucumbers”]
- Tools
- 2 large non-reactive bowls or pots
- 1 large colander
- Food grade gloves
- 3-4 liters airtight container or jar
- Cut up bok choy (including stems) into bite-sized pieces (5-7cm pieces). Cut cucumbers into halves and long spears.
- In a large non-reactive bowl/pot, lay down a layer of bok choy and cucumber pieces, and sprinkle some salt. Add another layer and sprinkle some more salt, and so on until the 2 tablespoon finishes. Let it sit in room temperature for 3-4 hours. This will draw out water from the boy choy leaves and cucumber pieces creating a natural brine. [br][img src=”http://www.justasdelish.com/wp-content/uploads/2015/05/BokChoyKimchi1-2.jpg” width=”300″ height=”200″ class=”alignnone size-full” title=”BokChoyKimchi1-2″] [img src=”http://www.justasdelish.com/wp-content/uploads/2015/05/BokChoyKimchi1-3.jpg” width=”300″ height=”200″ class=”alignnone size-full” title=”BokChoyKimchi1-3″]
- Just before the 3-4 hours is up, place garlic, ginger, 1/4 onion, 1/2 peeled apple, capsicum in a food processor or blender and puree until completely smooth.
- Cut 1 whole peeled apple into thin slices. And cut 1/2 onion into thin, long slices. Cut carrot into thin strips. Finally, cut green onions into 5cm pieces. [br] [img src=”http://www.justasdelish.com/wp-content/uploads/2015/05/BokChoyKimchi1-5.jpg” width=”300″ height=”200″ class=”alignnone size-full” title=”BokChoyKimchi1-5″] [img src=”http://www.justasdelish.com/wp-content/uploads/2015/05/BokChoyKimchi1-7.jpg” width=”300″ height=”200″ class=”alignnone size-full” title=”BokChoyKimchi1-7″]
- After 3-4 hours, rinse and wash away the excess salt from the salted bok choy and cucumbers. After all of the excess salt has been rinsed out, gently squeeze out excess water from the vegetables with your hands. [br]
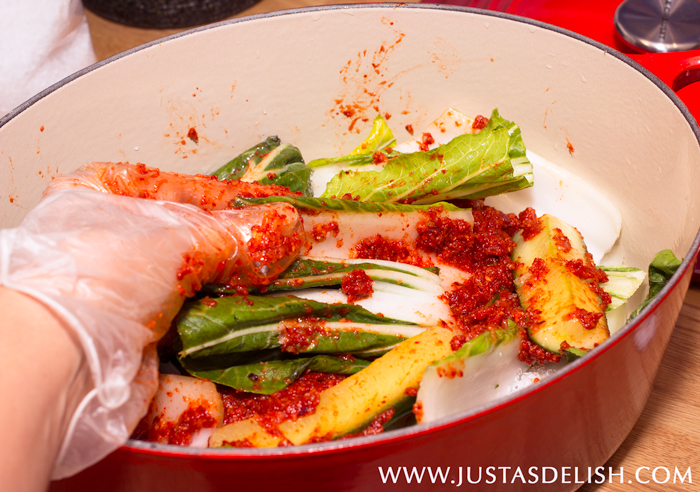
- Place the vegetables in a large mixing bowl. Add 1 tablespoon salt and gochugaru to the bok choy and cucumbers. Wear gloves and mix well using your hands.
- Add the puree and fish sauce. Mix well until well incorporated.
- Add sliced pear, apple, and onion. Mix. Add green onion pieces. Mix gently. [br] [img src=”http://www.justasdelish.com/wp-content/uploads/2015/05/BokChoyKimchi1-6.jpg” width=”300″ height=”200″ class=”alignnone size-full” title=”Bok Choy Kimchi with Cucumbers” alt=”Bok Choy Kimchi with Cucumbers”] [img src=”http://www.justasdelish.com/wp-content/uploads/2015/05/BokChoyKimchi1-8.jpg” width=”300″ height=”200″ class=”alignnone size-full” title=”Bok Choy Kimchi with Cucumbers” alt=”Bok Choy Kimchi with Cucumbers”]
- Pack the finished product into a big glass jar/container. Try to pack it tightly by pressing down as you are transferring it to the container. Make sure all of the kimchi juice and bits are transferred. Leave some room at the top of the jar – about 2 inches should suffice. If you don’t leave some room, kimchi liquid will bubble over and make a mess as it ferments.
- Leave the jar out in room temperature for about 48 hours depending on the room temperature and preference. It will take longer time in cooler temperature. Use a wooden spoon to press down the veggies, and there should be bubbles coming from the brine. Then the fermentation is complete. It should smell and taste sour. Refrigerate and store up to 2-3 weeks.. Serve chilled as side dish or use them in recipes. [br] [img src=”http://www.justasdelish.com/wp-content/uploads/2015/05/BokChoyKimchi1-10.jpg” width=”300″ height=”200″ class=”alignnone size-full” title=”Bok Choy Kimchi with Cucumbers” alt=”Bok Choy Kimchi with Cucumbers”] [img src=”http://www.justasdelish.com/wp-content/uploads/2015/05/BokChoyKimchi1-11.jpg” width=”300″ height=”200″ class=”alignnone size-full” title=”BokChoyKimchi1-11″]
Reference: http://english.visitkorea.or.kr/enu/FO/FO_EN_6_1_2_1.jsp

3 Comments
Leave a reply →